
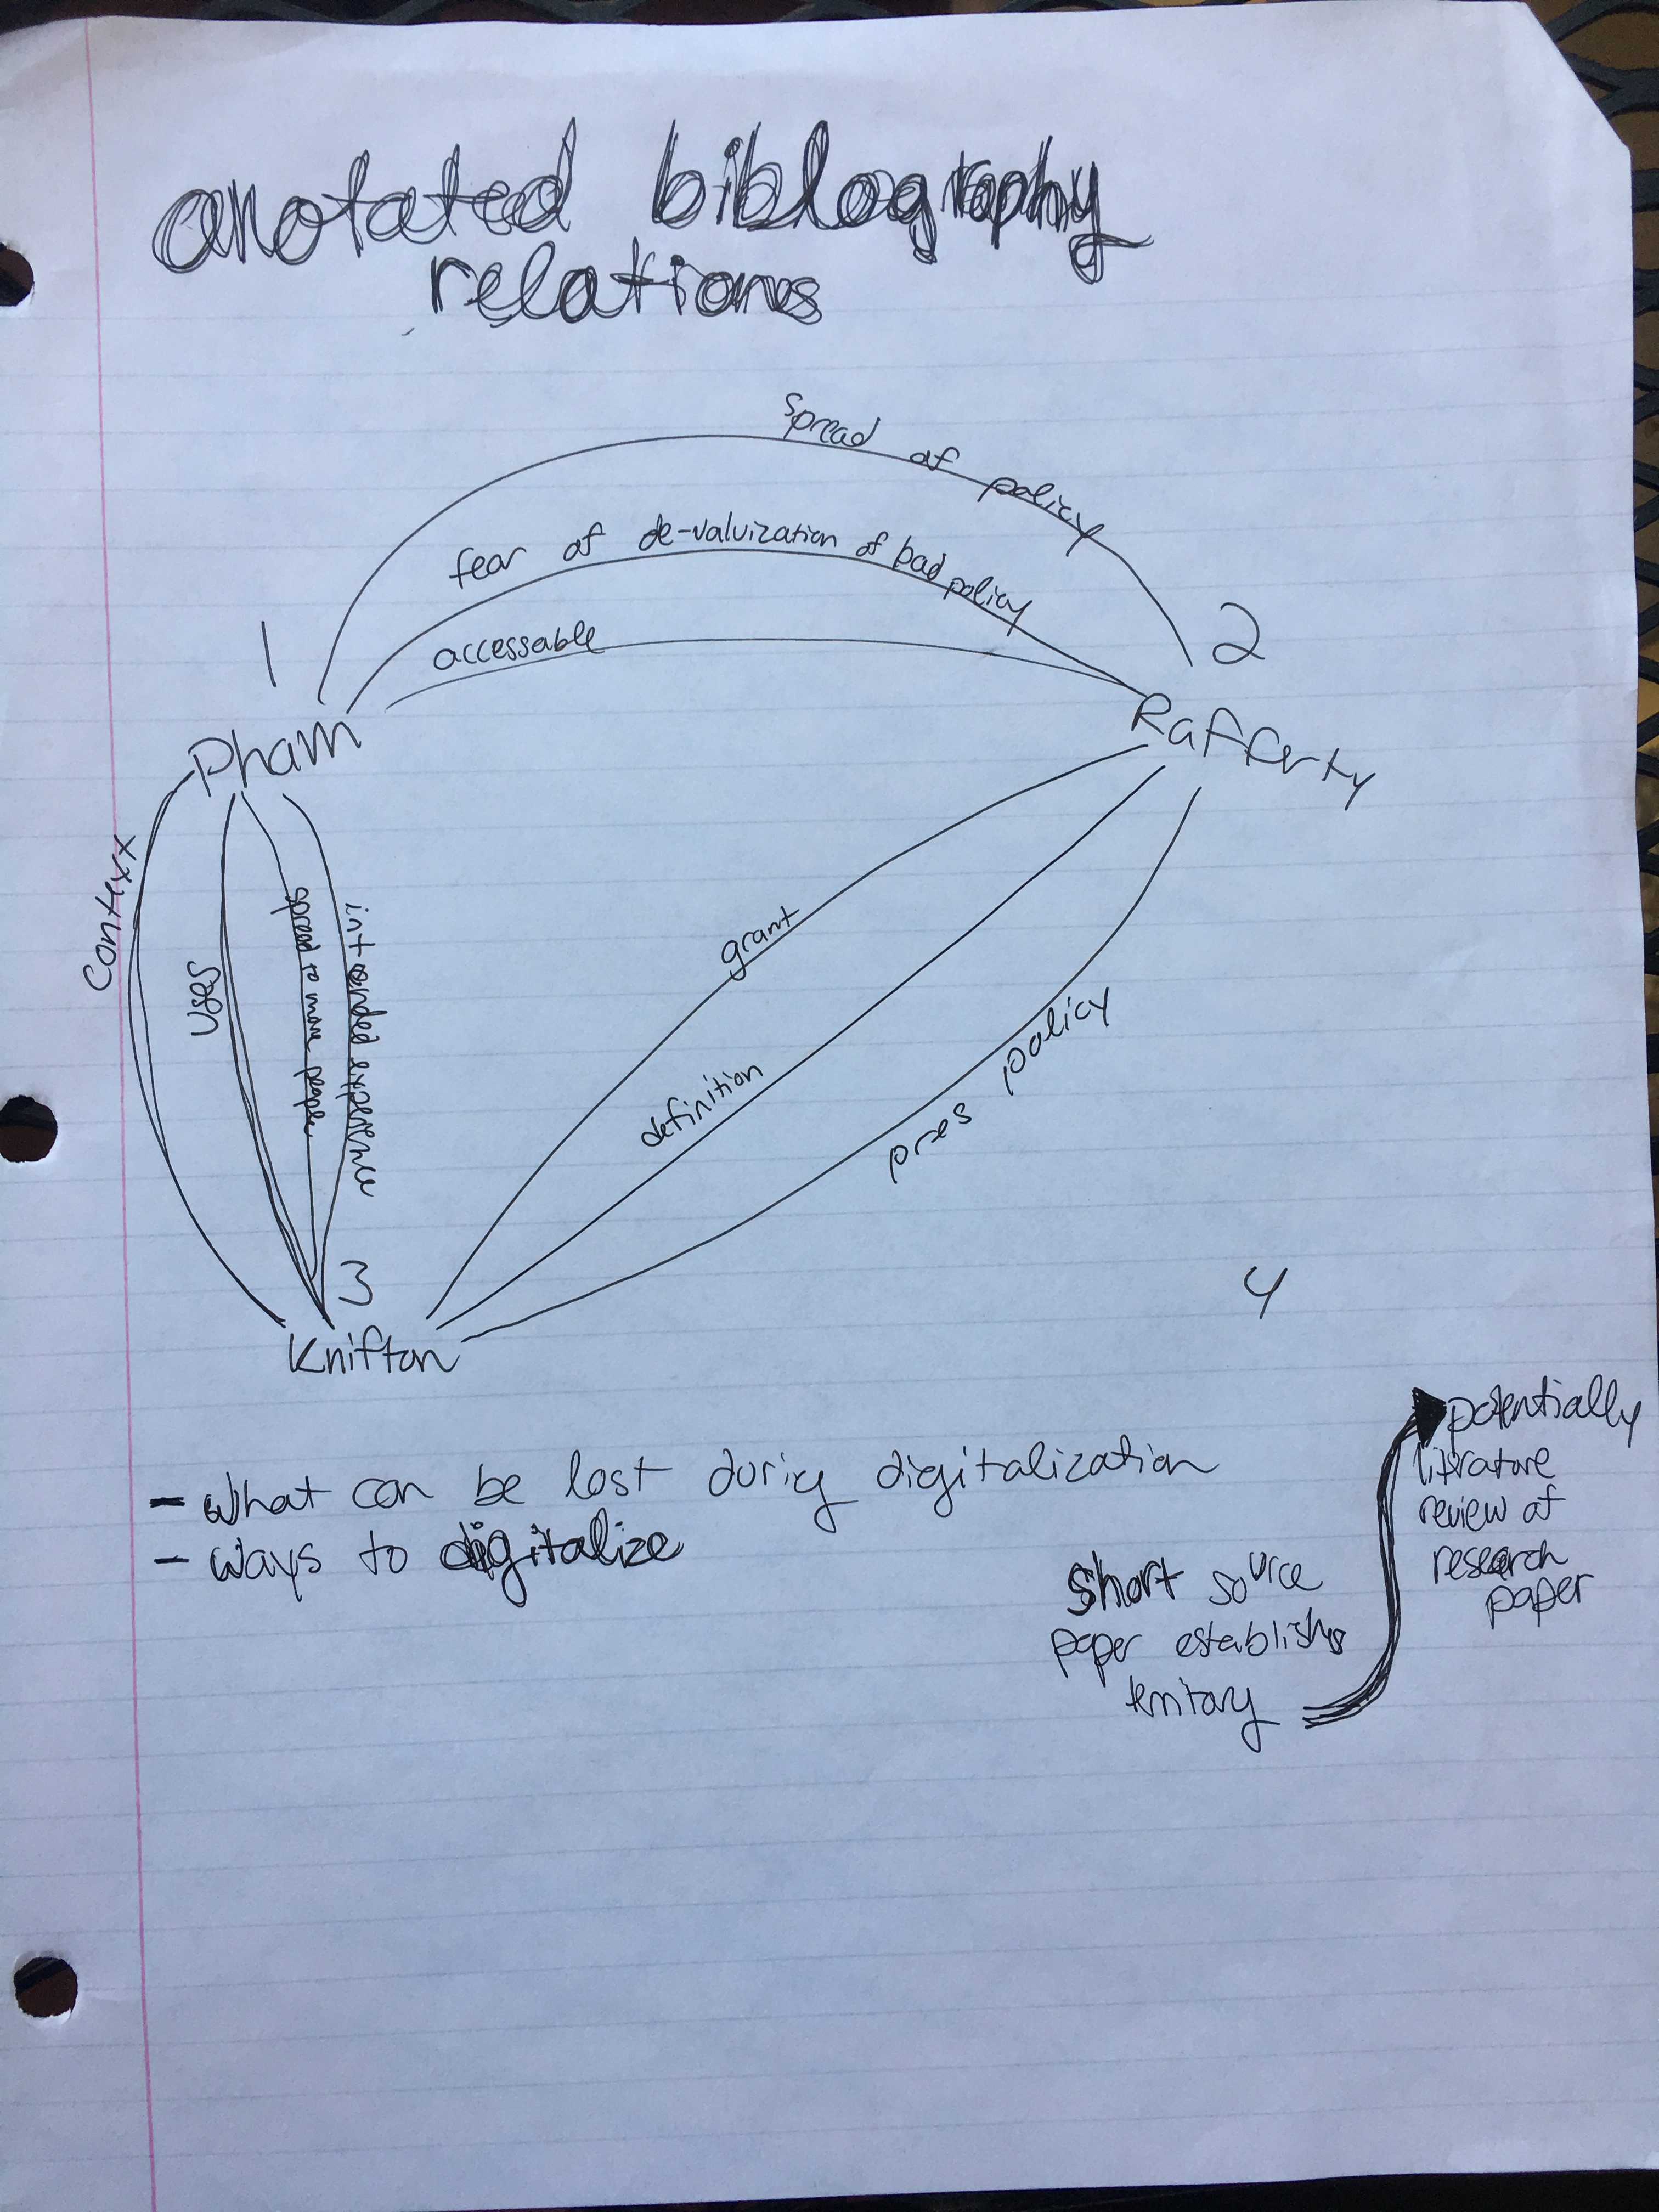
As I plan on writing my annotated bibliography for my upcoming research paper, I am tasked with drawing connections between authors. In class, I designed this sample of what I plan to do for all of my authors. I will walk you through this process.
step 1: Write a title (don’t sweat proper spelling) and draw over it a couple times as you think about what you’re going to do and how you’re going to do it. This may seem like an unnecessary aspect but this doodle time is essential to let yourself really consider what you are trying to accomplish. I though of what connections I could make after reading three authors so and I had to decide how I would do it.
step 2: Another critical yet mundane part is the spacing of the names. With only three authors to consider this isn’t terribly difficult although it is practice for when I have to draw up the big one with 9-12 authors who all need adequate space to make their connections. Since this is a visual representation, balance is very important.
Step 3: Make connections. This step has two parts.
a) figure out how you will represent these connections– I decided to write what points were being made on each line that connected the two points
b) make the actual connections looking at the bibliography that you just note and by looking through the article to recall some parts of it.
step 4: Take a minute to look at it and start to take away trends and patterns that you see.
Easy as that, a simple four step guide to start the synthesis process. Stay tuned for my next blog post that will demonstrate my four step guide to my 9 sources.
Until then…